Field-Tested DEHU Advice
If your GROW rooms fight humidity, the cause is often not the hardware; it’s how it’s installed and staged.
If your grow rooms fight humidity, the cause is usually not the hardware; it’s how your dehumidification units were installed and staged. In dozens of troubleshooting site visits, we see the same patterns: units crammed against walls, discharge pointed at AC returns, units powered by incorrect voltage, and single “monster” machines trying to modulate what only a fleet can handle.
The fix isn’t complicated. Plan early, place smart, wire correctly, and give yourself redundancy.
Here’s a straight-talk guide based on real issues our engineers and reps troubleshoot every week, now with quick checklists you can act on immediately.
Bring Us In at Design—Not After First Harvest
Start the conversation with us before drywall goes up. Share room dimensions, canopy layout, HVAC supply/return locations, available voltage and amps, and your target setpoints.
We’ll properly size for your space using actual performance numbers at your setpoint conditions—not from nameplate ratings at 80°F/60% RH.
Colder rooms carry less water in the air and every dehumidifier’s capacity drops with dew point; if you size from the brochure instead of the performance curve, you’ll be undersized on Day 1. Early coordination also prevents the classic layout error: dehus and air conditioners “fighting” each other.
Quick checklist:
Do send drawings (plan/elevation), target RH/temps, and available power at the design stage.
Do ask for capacity from the performance curves at your real setpoints.
Don’t size from 80/60 nameplates or “pints per day” alone.
Don’t place dehus where their intake sees AC supply air or their discharge feeds AC returns.
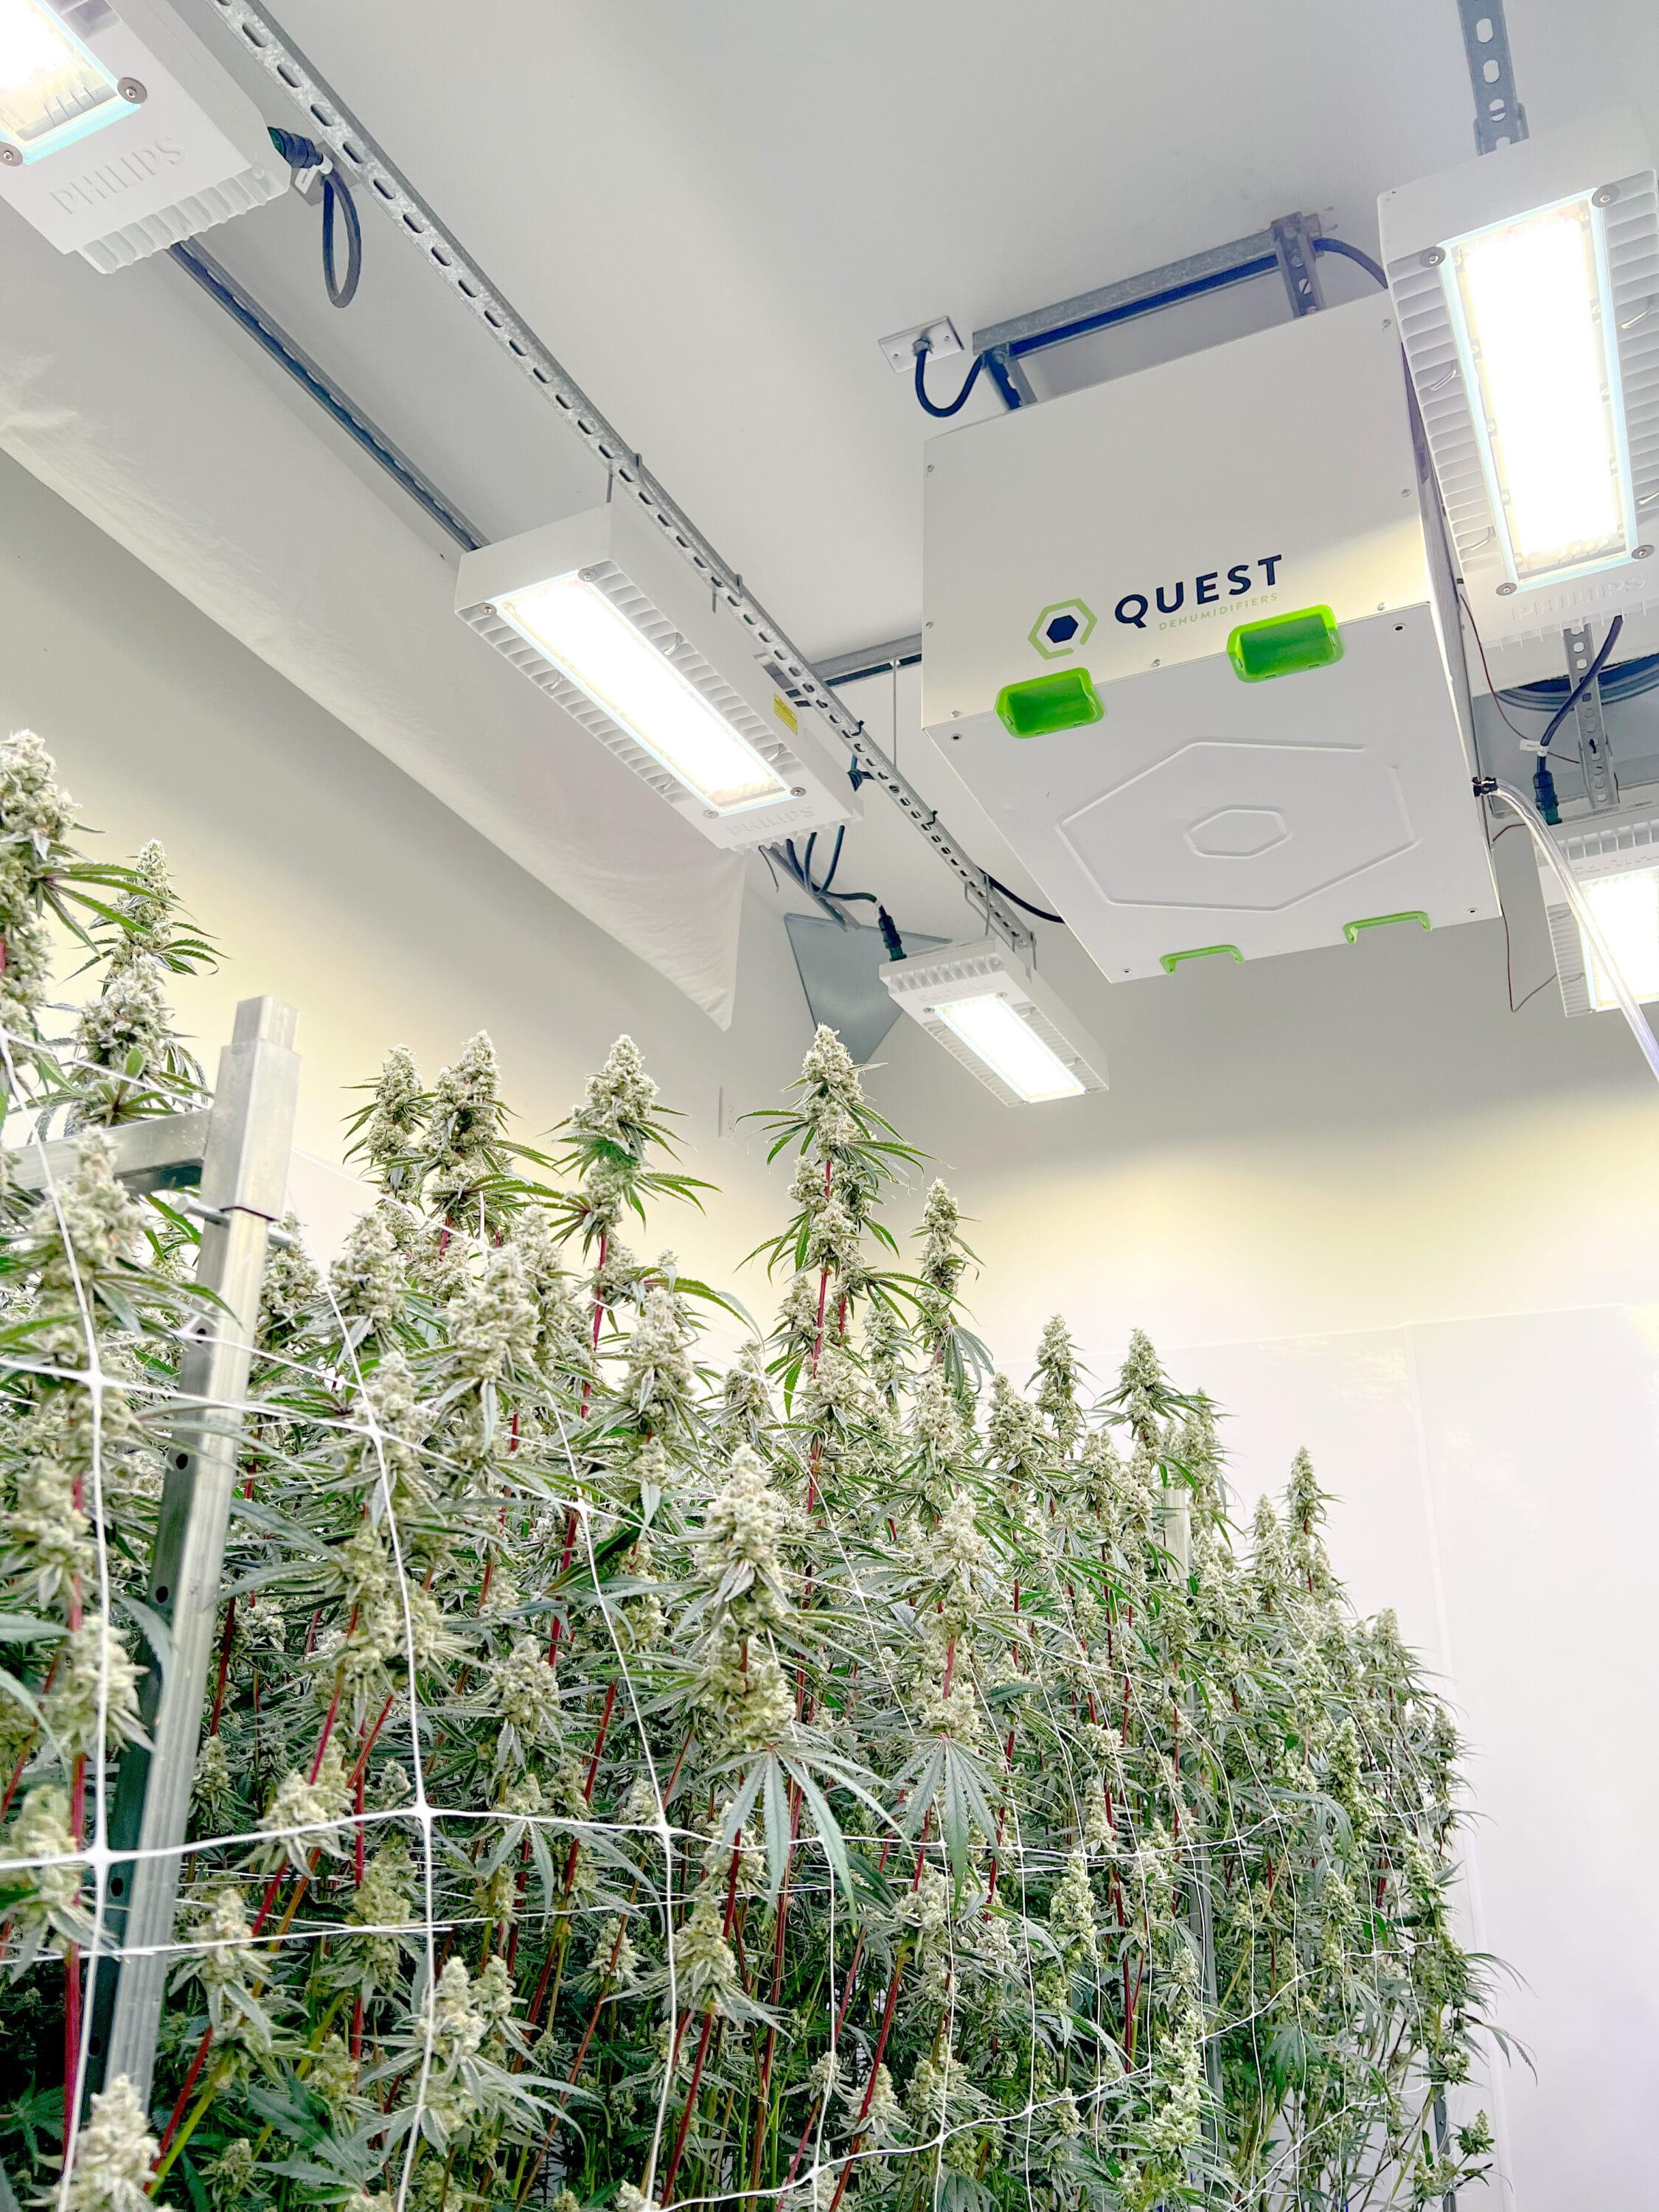
Give each unit breathing room and aim the discharge down aisles or over the canopy so the dry air washes the room before it finds the return.
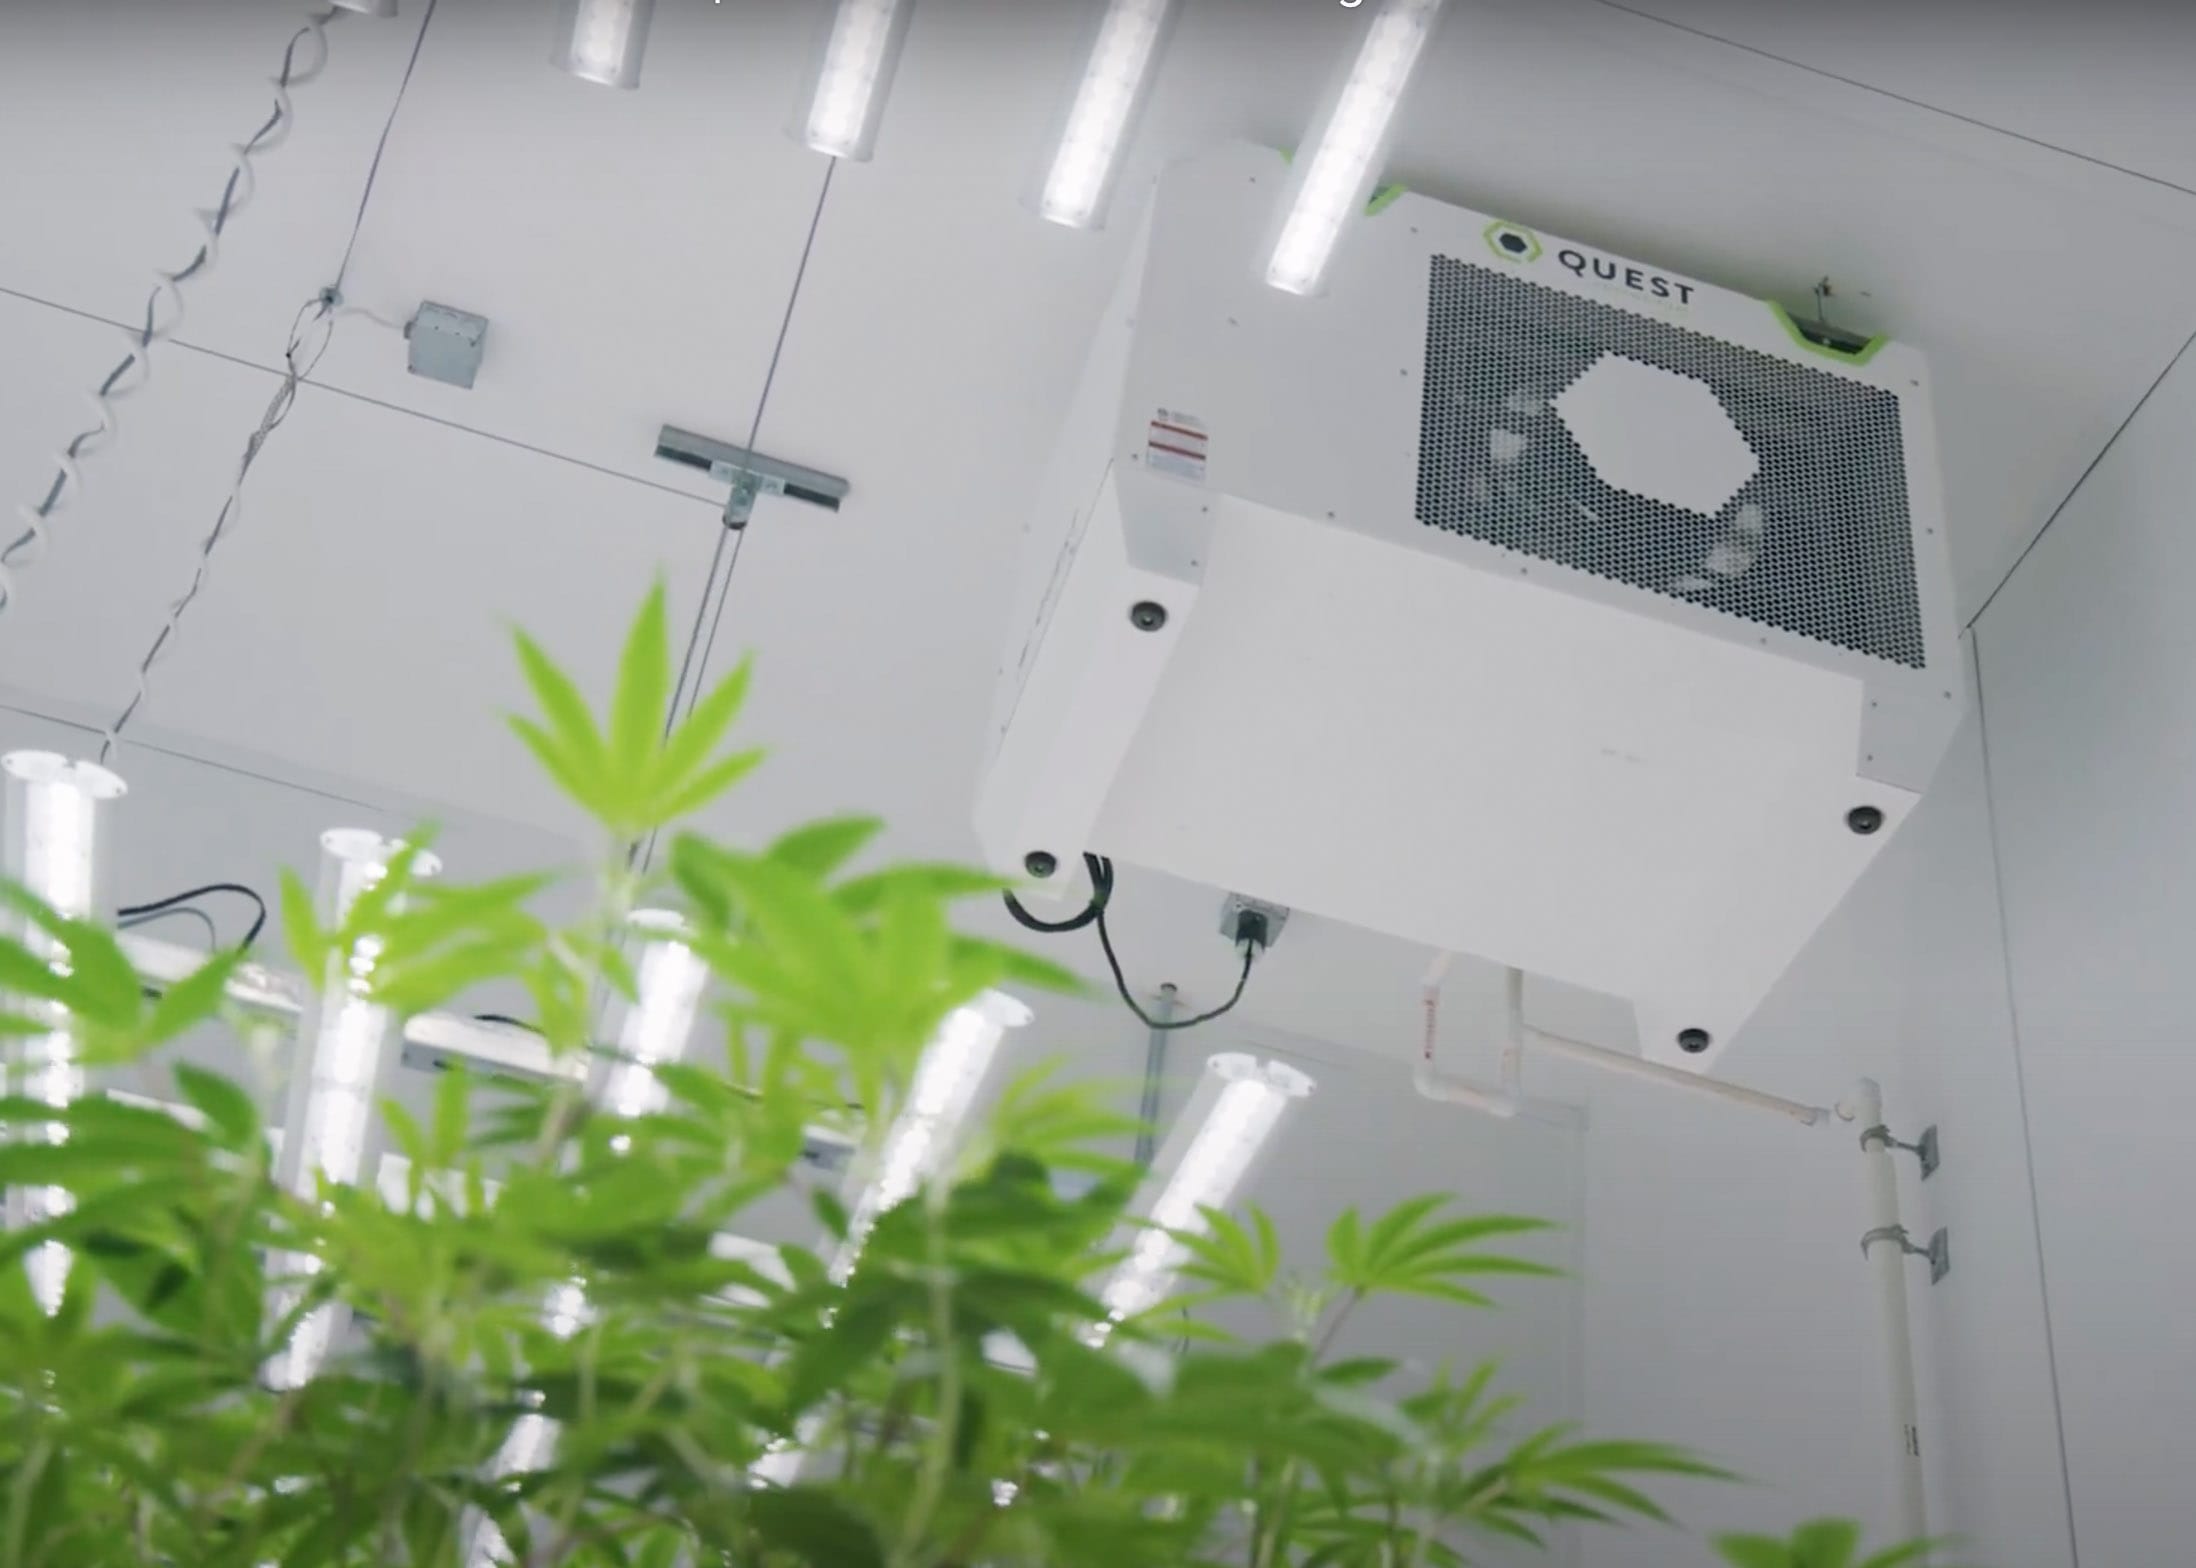
Don’t place your dehumidifier a foot off a wall or tuck it directly under an AC register, as both will short-circuit airflow and kill moisture removal. Distribute units to match room geometry: triangle for three, corners for four, then space evenly to avoid dead zones. Plan circulation in the same breath as placement; without enough floor or basket fans, heat and dryness pool near the machine and leave wet corners to fester. While Quest dehumidifiers can be placed outside of your grow room and ducted, keep in mind that the discharge from the dehumidifier is the dried air that needs to be remixed into your conditioned space. Never duct your dehumidifier’s discharge into a hallway— you’d have built an expensive exhaust fan, not a dehumidification loop.
Quick checklist:

Do keep clearances around intakes/returns; point discharge along aisles or over canopy.
Do balance placement with your mixing fans to sweep dry air through every rack.
Don’t mount directly under an AC register or jam discharge against a wall.
Don’t pull from the room and exhaust into another room.
Ducting: Keep It Short, Smooth, and Sensible
Duct only when it solves a real problem, then keep ductwork short and elbows to a minimum. While Quest’s proprietary M-CoRR technology significantly reduces the impact, every turn adds resistance, drops airflow, and drives the coil toward frost. Insulate duct that crosses cold zones to prevent sweating, and never create a loop where dehu discharge finds an HVAC return.
Quick checklist:
Do choose proper duct materials and size for the unit’s CFM.
Do minimize bends; use long-radius elbows when you must turn.
Don’t run discharge toward HVAC returns or starve the unit with undersized flex.
Don’t leave uninsulated duct in cold corridors where it will sweat.
Electrical and Mounting: Match, Rate, and Respect the Structure
Confirm your available supply voltage and amps before ordering equipment. Don’t “make it fit” with creative adapters or transformers. Quest has a wide selection of voltage options to fit your electrical needs. Keep low-voltage control wires out of the same tray as high-voltage feeders; induced voltage can make a unit start or stop when it shouldn’t. Hang from rated hardware and structure, keep units level so condensate drains properly, and observe local seismic and head-clearance requirements. On midsize models, don’t run threaded rod so deep it contacts internal components. Threaded rod should be inserted at least 1.5” but no more than 2.5”.
Quick checklist:
- Do verify voltage/phase on site and order to match.
- Do separate low-voltage controls from high-voltage conductors.
- Do use rated hangers/anchors and maintain level for proper drainage.
- Don’t modify plugs, over-load roof framing, or drive threaded rod too far into the dehumidifier cabinet: maximum 2.5”.
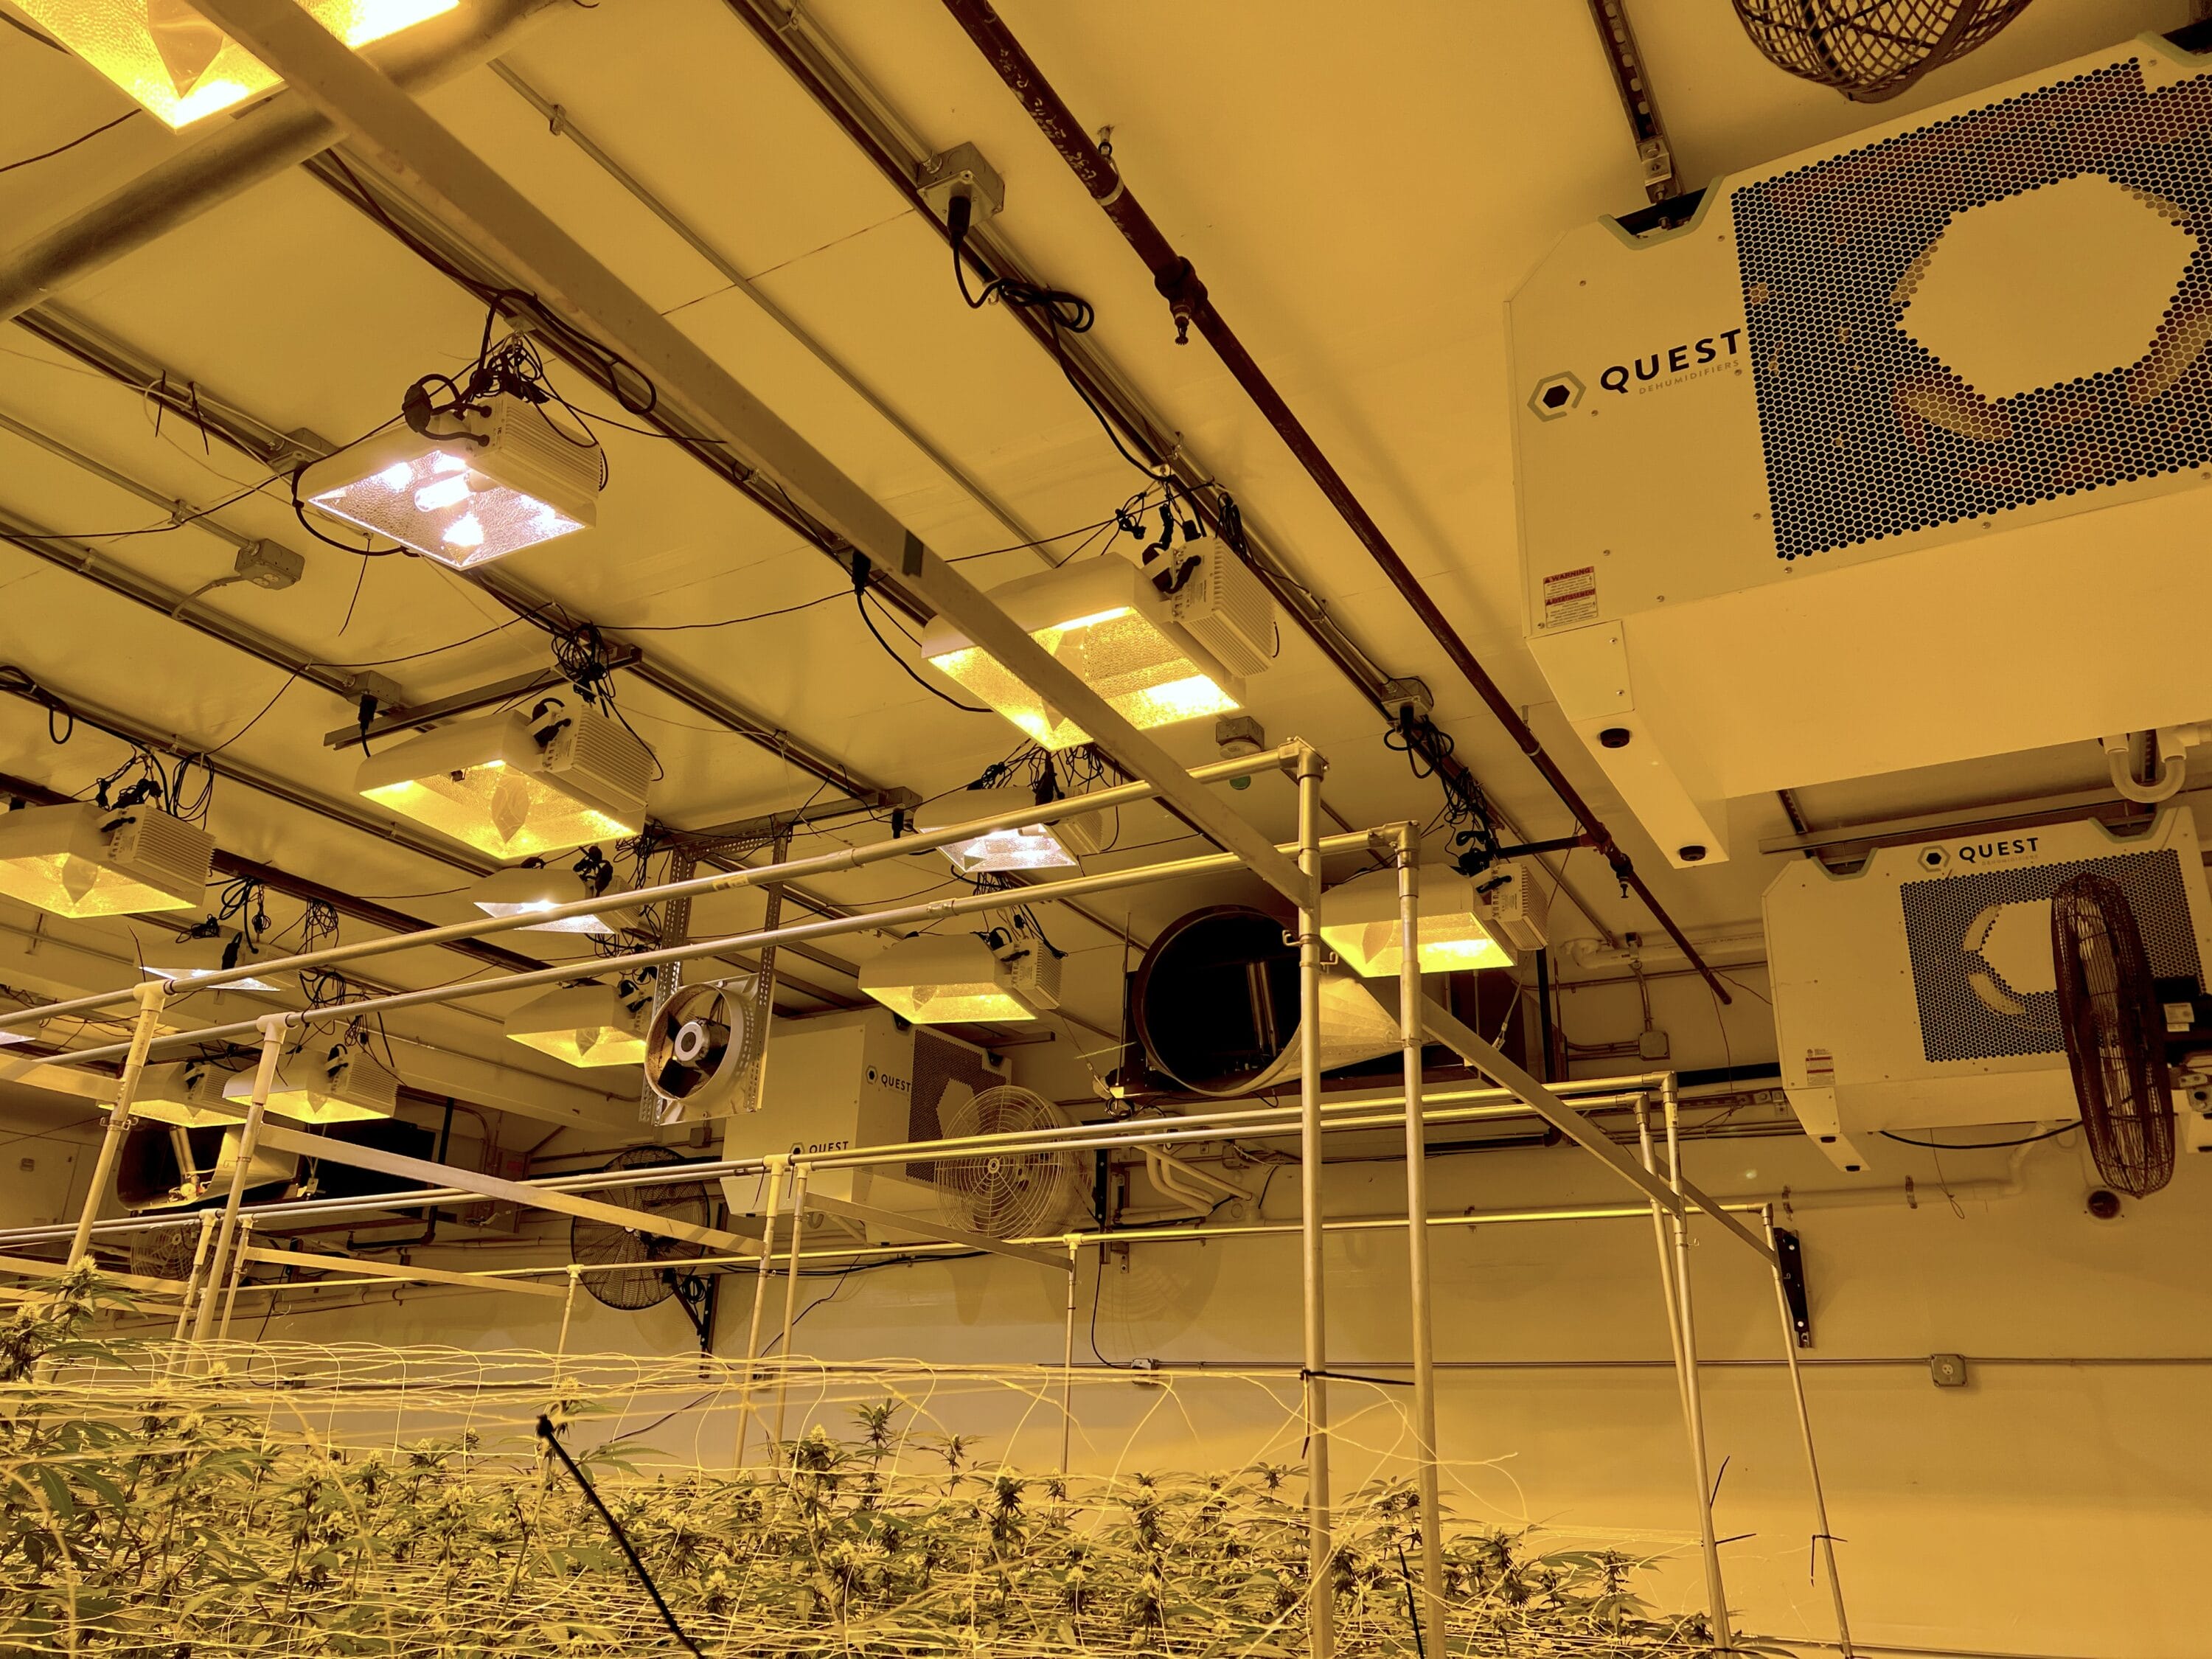
Redundancy and Staging Beat Single-Point “Big Iron”
One or two giant units look tidy on a drawing, but they create a single point of failure and wide RH swings.
Multiple mid-size machines let you stage capacity, hold a tighter band, and ride through servicing a unit. In many flower rooms, four to six dehumidifiers is the sweet spot: enough granularity to stagger setpoints, enough overlap to survive a compressor trip without losing the crop. Avoid daisy-chaining every machine to one control signal; that setup behaves like one oversized unit.
Quick checklist:
Do design for staging with multiple mid-size units and lead-lag rotation.
Do keep a modest capacity buffer for spikes and maintenance windows.
Don’t rely on a single large unit as your only control point.
Don’t daisy-chain all units to one on/off signal.
Safety and Serviceability
Plan safe access. Avoid hanging units directly over plants if you can; technicians end up on ladders over valuable canopy.
Maintain code headroom under ceiling-hung units and respect seismic bracing where required. In greenhouses, verify the structure can carry the added load before you hang anything.
Quick checklist:
Do leave service clearance and safe ladder access.
Do confirm head-clearance and seismic/bracing requirements with your inspector.
Don’t hang over high-value canopy if there’s any alternative.
Don’t exceed structural load limits of trusses or greenhouse spans.
Post-Install Ownership: Two Habits Prevent Most Calls
Keep filters clean and drains clear. This is very important.
A clogged filter starves airflow, the coil gets too cold, frost forms, and capacity falls off a cliff. A plugged drain backs water into the cabinet and onto the floor.
Never run without a filter “just for a day”—the filter helps keep the internal components of your dehumidifier clean and performing as it should. Bright grow lighting penetrates clear Schedule-40 PVC; algae follows. Use opaque drains or shield them from light, and clean drains each crop turn.
Quick checklist:
Do change filters on schedule and keep spares on hand.
Do flush and vacuum condensate drains at every room turn; use opaque routing to help prevent bio-growth.
Don’t operate without a filter, even temporarily.
Don’t ignore early signs: unusual frosting, gurgling drains, or rising RH at normal load.
Budgeting and Rebates: Build What You Can Control
If you can’t equip the whole canopy correctly on Day 1, phase the build. A smaller, fully controlled room beats a larger, under-equipped room every time.
Check utility rebates early; many programs pay incentives for high-efficiency dehumidification and can offset a meaningful chunk of your first purchase. A conservative capacity buffer keeps control tight when conditions drift, irrigation expands, or a door sits open too long. That’s not overselling; it’s protecting yield and schedule.
Quick checklist:
Do phase canopy to match the environmental budget you can do right.
Do pursue local energy rebates for high-efficiency dehumidifiers.
Don’t stretch square footage beyond your control equipment.
Don’t forget to account for colder setpoints and derated capacity in the pro forma.
The Bottom Line
Good installs aren’t fancy. They’re disciplined.
Involve Quest during design. Place for airflow, not convenience. Match voltage and mount correctly. Stage with multiple mid-size units instead of one monster. Make filter changes and drain checks a habit. Do those things and your RH line stays flat, your equipment lives longer, and your team spends nights at home instead of chasing alarms.
If you’re scoping a new room or reworking one that never quite behaved, send us your drawings and constraints. We’ll help you spec a layout that works in the real world—and keeps working when the crop is on the line.
Published on Oct 06 2025
Last Updated on Jun 05 2026
Categories: Agriculture, Efficiency, Growing Cannabis, High Plant Yield, Humidity